Alright folks, if you're here, chances are you've got a burning desire to learn how to draw a horse. Who wouldn’t want to master this majestic creature, right? Whether you're a complete beginner or someone who's been sketching for years, drawing a horse can be both challenging and rewarding. Let’s face it—horses are not just animals; they’re symbols of grace, power, and freedom. And if you can capture that essence on paper, you’re golden. So buckle up, because we’re about to dive deep into the world of horse art.
Before we get started, let me tell you something: drawing a horse doesn’t have to be intimidating. Sure, it might seem like a complex task at first, but with the right techniques and a little patience, anyone can do it. We’ll break down the process step by step, making sure you understand every detail along the way. By the end of this guide, you’ll feel confident enough to create your own stunning horse drawings.
Now, let’s not waste any time. Grab your pencils, erasers, and sketchbooks—it’s time to unleash your inner artist. Let’s explore how to draw a horse like a pro!
Read also:Sam Elliott A Democrat Or Republican
Table of Contents:
- Biography of the Horse
- Tools You’ll Need
- Understanding the Basics
- Step-by-Step Sketching
- Horse Anatomy Breakdown
- Adding Details
- Shading Techniques
- Creating Dynamic Poses
- Exploring Different Styles
- Pro Tips for Beginners
- Final Thoughts
Biography of the Horse
Horses have been around for centuries, playing a crucial role in human history. They’ve been our companions in war, work, and leisure. But let’s talk about them from an artist’s perspective. Horses are not just subjects to draw—they’re inspirations. Their elegant curves, muscular builds, and expressive eyes make them perfect for artistic expression.
Horse Facts at a Glance
| Fact | Details |
|---|---|
| Average Lifespan | 25-30 years |
| Height | 14-17 hands (1 hand = 4 inches) |
| Weight | 900-2,000 pounds |
| Speed | Up to 55 mph |
Tools You’ll Need
Alrighty, let’s talk tools. You don’t need fancy gadgets to start drawing a horse. In fact, some of the best artists use the simplest materials. Here’s what you’ll need:
- Pencils (HB, 2B, 4B, 6B)
- Sketchbook or drawing paper
- Erasers (kneaded and regular)
- Blending stumps
- Reference images (optional)
Remember, the quality of your tools matters, but it’s your skill that truly makes the difference. Don’t stress too much about having the "perfect" setup—just start with what you’ve got.
Understanding the Basics
Before you put pencil to paper, it’s important to understand the basics of horse anatomy. Knowing the structure of a horse will help you create more accurate and lifelike drawings. Think of it as laying the foundation for your masterpiece.
Key Elements to Focus On
Here’s a quick rundown of the essential parts:
Read also:Punjabi Mms Videos
- Head and neck
- Body shape
- Legs and hooves
- Tail
Each part plays a role in the overall appearance of the horse. Take your time to study these elements before moving on to the next step.
Step-by-Step Sketching
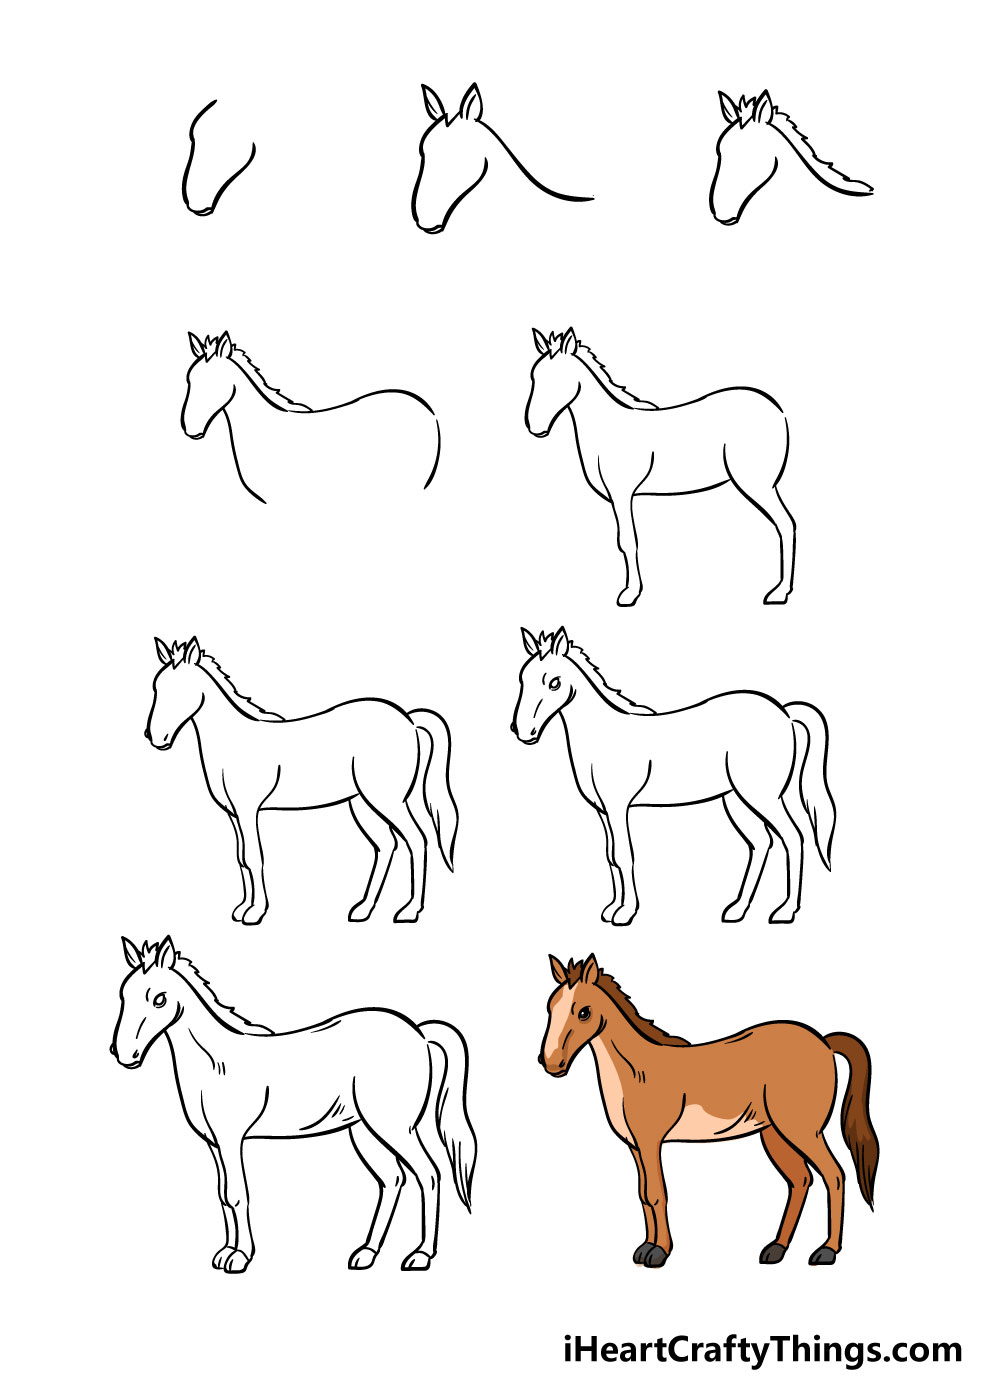
Now that you’ve got the basics down, it’s time to start sketching. Follow these steps to create a basic horse outline:
- Draw an oval for the body.
- Add a smaller circle for the head.
- Connect the head and body with a curved line for the neck.
- Sketch four lines for the legs.
- Refine the shapes and add details like the ears, eyes, and tail.
Don’t worry if your first attempt doesn’t look perfect. Sketching is all about practice and refinement.
Horse Anatomy Breakdown
Horse anatomy is fascinating. Understanding the skeletal and muscular structure will help you create more realistic drawings. Let’s break it down:
- Skeleton: Focus on the skull, spine, ribs, and leg bones.
- Muscles: Pay attention to the muscles in the neck, shoulders, and hindquarters.
- Proportions: Make sure the body parts are in proportion to each other.
Studying anatomy might sound boring, but trust me—it’s the key to creating stunning horse drawings.
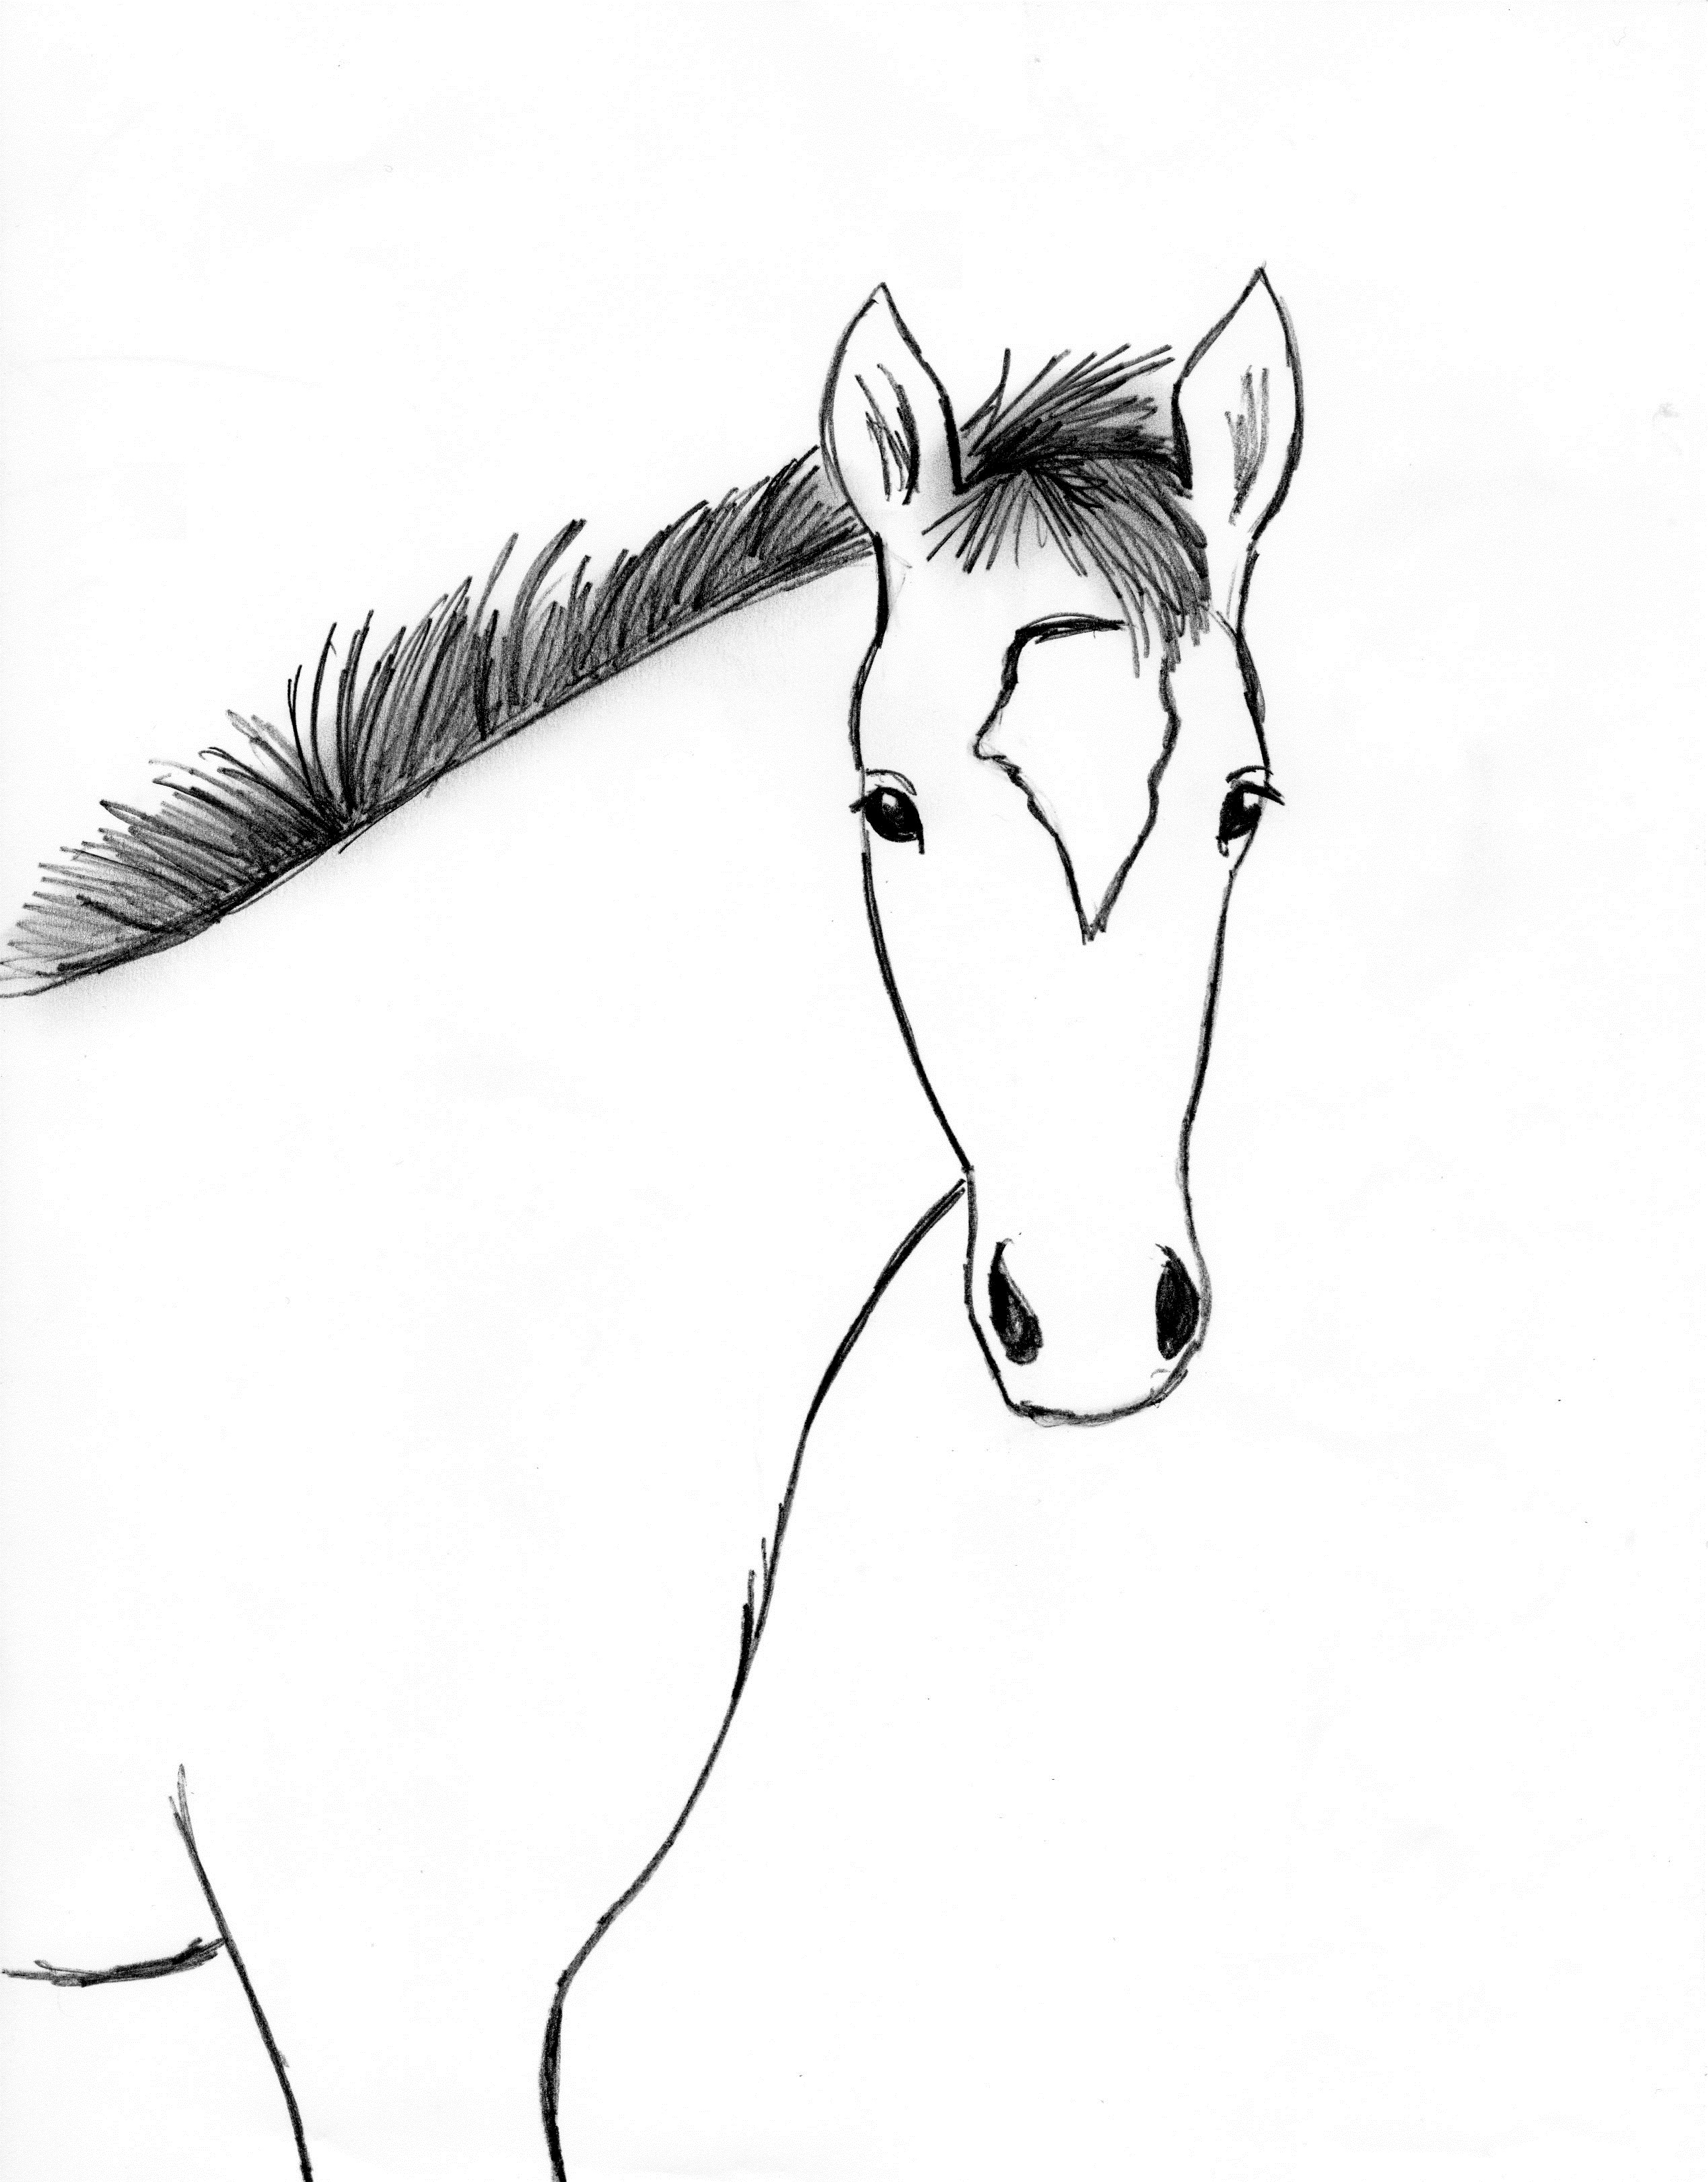
Adding Details
Once you’ve got the basic structure down, it’s time to add details. This is where your drawing comes to life. Here are some tips:
- Define the facial features—eyes, nose, and mouth.
- Add texture to the mane and tail.
- Highlight the muscles and joints for a more realistic look.
Details make all the difference. Take your time and don’t rush this step.
Shading Techniques
Shading gives your drawing depth and dimension. Here are some techniques to try:
- Hatching: Parallel lines to create shading.
- Cross-hatching: Crossing lines to add more depth.
- Stippling: Using dots to create shading.
Experiment with different techniques to find what works best for you. Remember, practice makes perfect.
Creating Dynamic Poses
Static poses are great, but dynamic poses really bring your horse to life. Here’s how to create them:
- Study reference images of horses in motion.
- Focus on capturing the movement in the legs and tail.
- Experiment with different angles and perspectives.
Dynamic poses can be tricky, but they’re worth the effort. They add excitement and energy to your artwork.
Exploring Different Styles
Art is all about personal expression. Don’t be afraid to explore different styles when drawing horses. Here are a few to consider:
- Realism: Focus on accuracy and detail.
- Cartoon: Simplify the features for a fun, playful look.
- Abstract: Experiment with shapes and colors.
There’s no right or wrong way to draw a horse. Find a style that resonates with you and go for it.
Pro Tips for Beginners
Here are some final tips to help you on your horse-drawing journey:
- Practice regularly—even if it’s just for a few minutes a day.
- Study other artists’ work to learn new techniques.
- Don’t be afraid to make mistakes—they’re part of the learning process.
Remember, becoming a skilled artist takes time and dedication. Keep pushing yourself and you’ll see improvement over time.
Final Thoughts
Learning how to draw a horse is a journey filled with challenges and rewards. From understanding anatomy to mastering shading techniques, every step brings you closer to creating stunning artwork. Whether you’re drawing for fun or pursuing a career in art, the skills you gain will serve you well.
So, what are you waiting for? Grab your pencils and start sketching. Share your progress with the world, and don’t forget to check out more tutorials on our site. Happy drawing, folks!
And hey, if you’ve got any questions or feedback, drop a comment below. We’d love to hear from you!
![How To Draw A Horse In 10 Steps [A Beginner’s Guide] (2023)](https://www.biowars.com/blog/wp-content/uploads/2022/07/how-to-draw-horse-finished.jpg)
