Hey there, fellow artist! If you're here, it means you're ready to dive into the magical world of snowflake drawing. How to draw a snowflake is not just about creating a pretty design; it’s about embracing the beauty of symmetry and nature. Snowflakes are like tiny masterpieces that fall from the sky, each one unique in its own way. And today, you’ll learn how to bring that same magic onto your paper. So, grab your pencils, erasers, and let’s get started, shall we?
Now, I know what you’re thinking. "Isn’t drawing a snowflake hard?" The answer is no—not if you follow the right steps! In this guide, we’ll break down the process into simple, manageable chunks so even if you’re a total beginner, you’ll end up with a stunning snowflake by the end of this tutorial. Plus, we’ll share some tips and tricks along the way to make your snowflake look extra special.
Before we jump into the nitty-gritty, let’s talk about why snowflakes are such a cool subject to draw. They’re not just random shapes—they’re intricate patterns that follow specific rules of geometry. By learning how to draw a snowflake, you’ll not only improve your artistic skills but also gain a deeper appreciation for the wonders of nature. Ready to learn? Let’s go!
Read also:Xnnn
Here’s a quick overview of what we’ll cover:
- Introduction to Snowflakes
- Tools You’ll Need
- Basic Steps to Draw a Snowflake
- Understanding Symmetry
- Creating Unique Variations
- Pro Tips for Stunning Snowflakes
- Examples of Beautiful Snowflakes
- Drawing Snowflakes Digitally
- Common Mistakes to Avoid
- Conclusion
Introduction to Snowflakes
Alright, let’s start with the basics. Snowflakes are basically ice crystals that form in the atmosphere under specific conditions. Each snowflake is unique, thanks to the way water molecules bond together as they freeze. But here’s the fun part: even though every snowflake is different, they all follow certain patterns and rules. This makes them perfect for drawing because you can experiment with different designs while still keeping things realistic.
When you think about how to draw a snowflake, the first thing you need to understand is symmetry. Most snowflakes have six sides, which means they’re perfectly balanced. This balance is what gives snowflakes their iconic beauty. By mastering symmetry, you’ll be able to create snowflakes that look both realistic and artistic.
Why Are Snowflakes So Fascinating?
Besides being visually stunning, snowflakes are also scientifically fascinating. Did you know that no two snowflakes are exactly alike? This is because their shape is influenced by factors like temperature, humidity, and wind conditions as they fall through the atmosphere. Scientists have identified over 80 different types of snowflakes, each with its own unique characteristics. So, when you draw a snowflake, you’re essentially recreating a piece of nature’s art.
Tools You’ll Need
Before we dive into the drawing process, let’s talk about the tools you’ll need. Don’t worry—you don’t need anything fancy to get started. Here’s a list of essentials:
- Pencil (HB or 2B works great)
- Eraser (a kneaded eraser is ideal for fine details)
- Paper (smooth drawing paper is best)
- Pen or marker (optional, for outlining)
- Ruler (optional, for precision)
- Colored pencils or markers (if you want to add color)
Pro tip: If you’re new to drawing, start with a pencil so you can easily erase mistakes. Once you’re happy with your design, you can go over it with a pen or marker to make it stand out.
Read also:Viral Mms Com
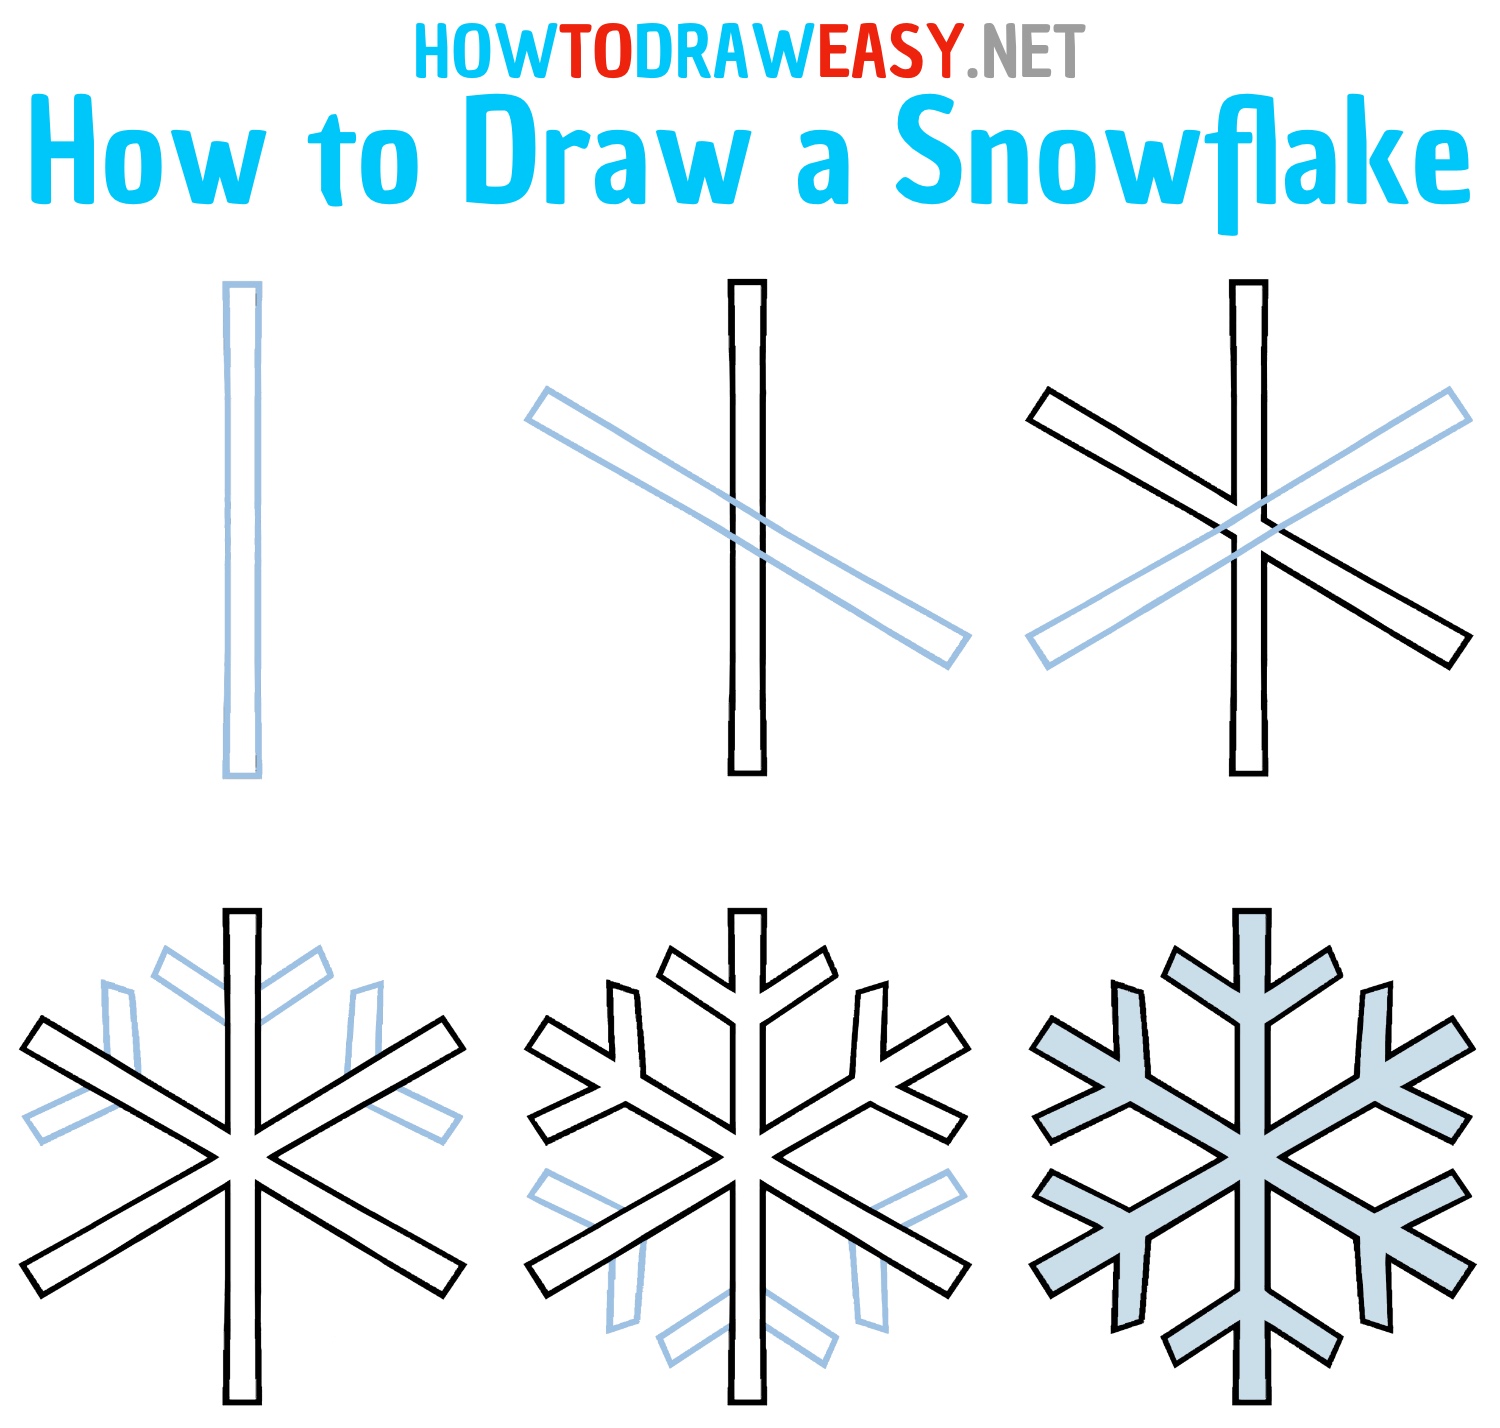
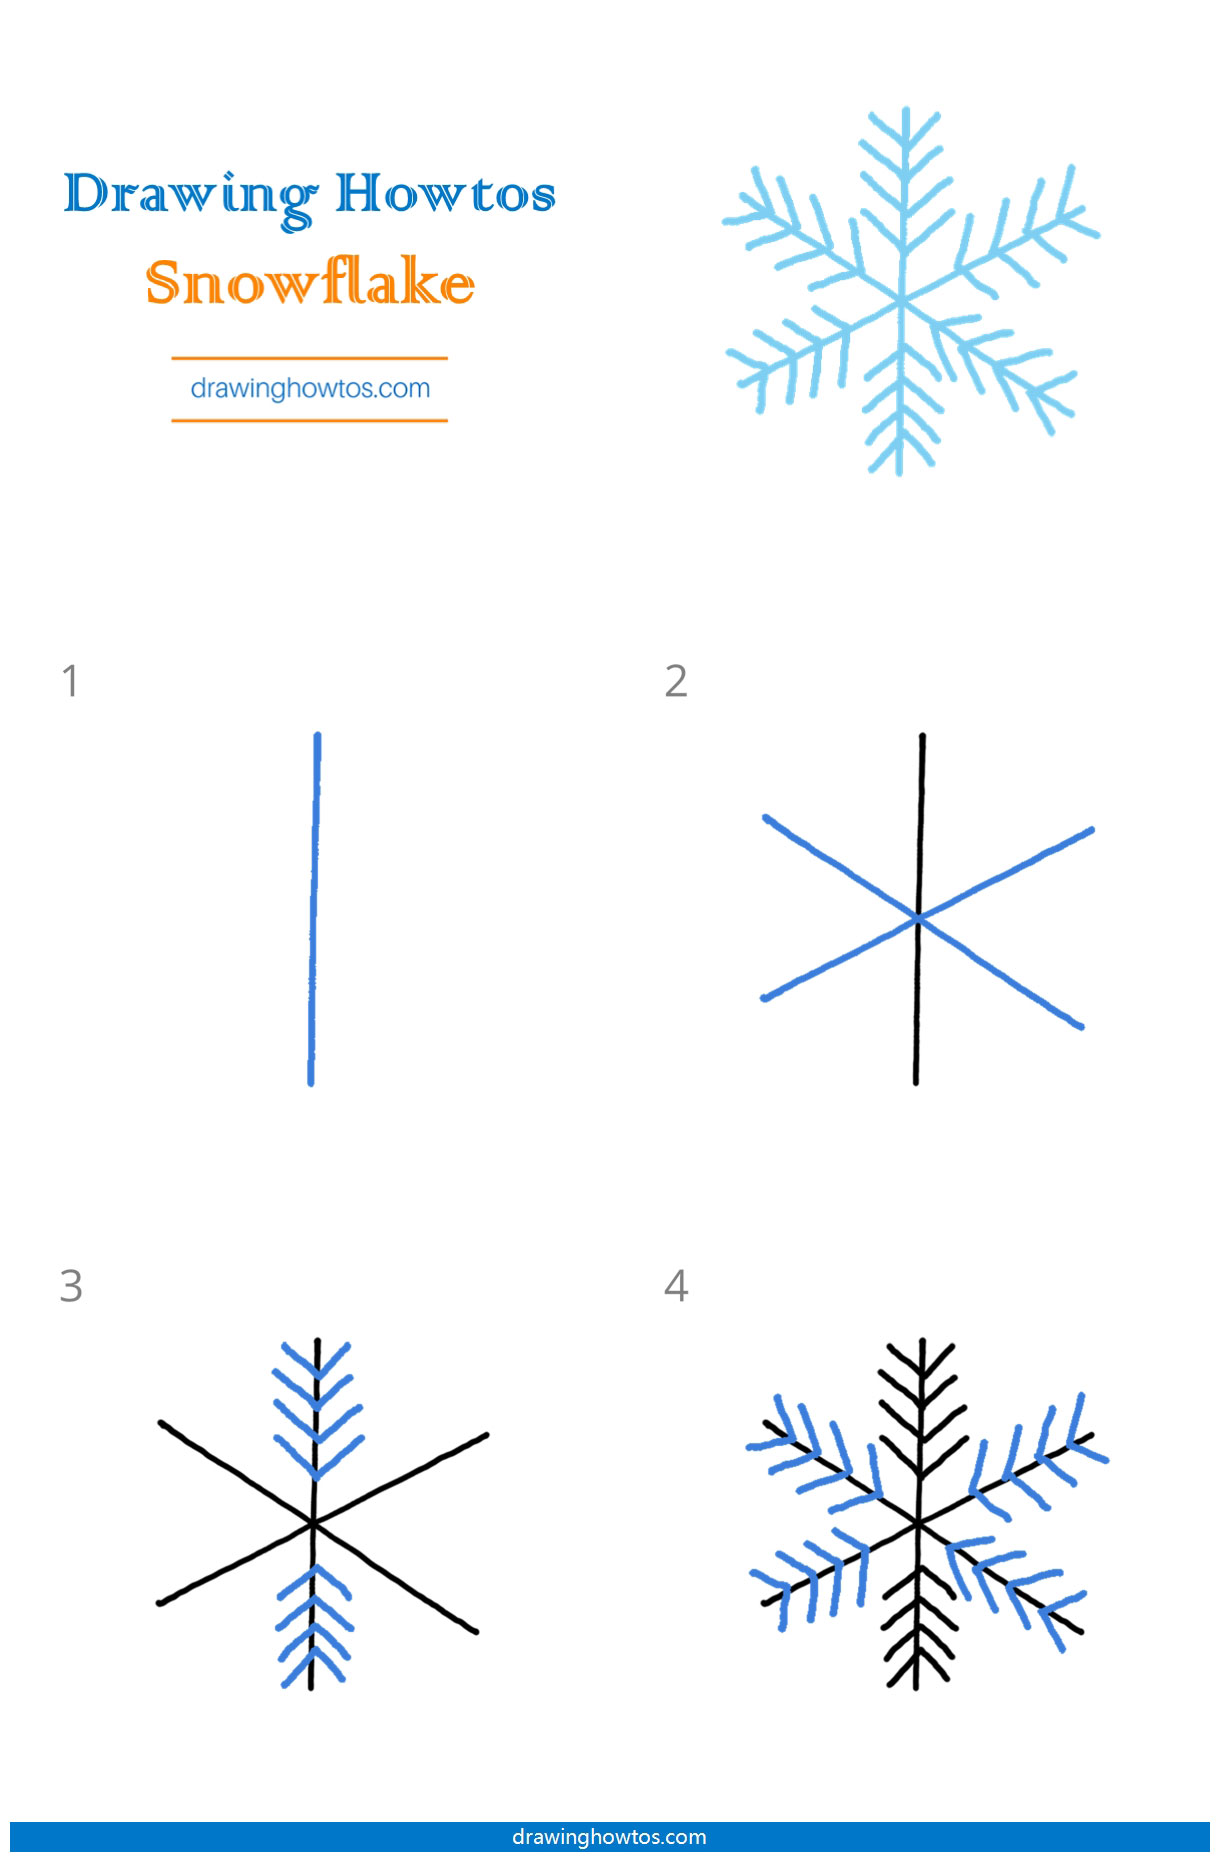
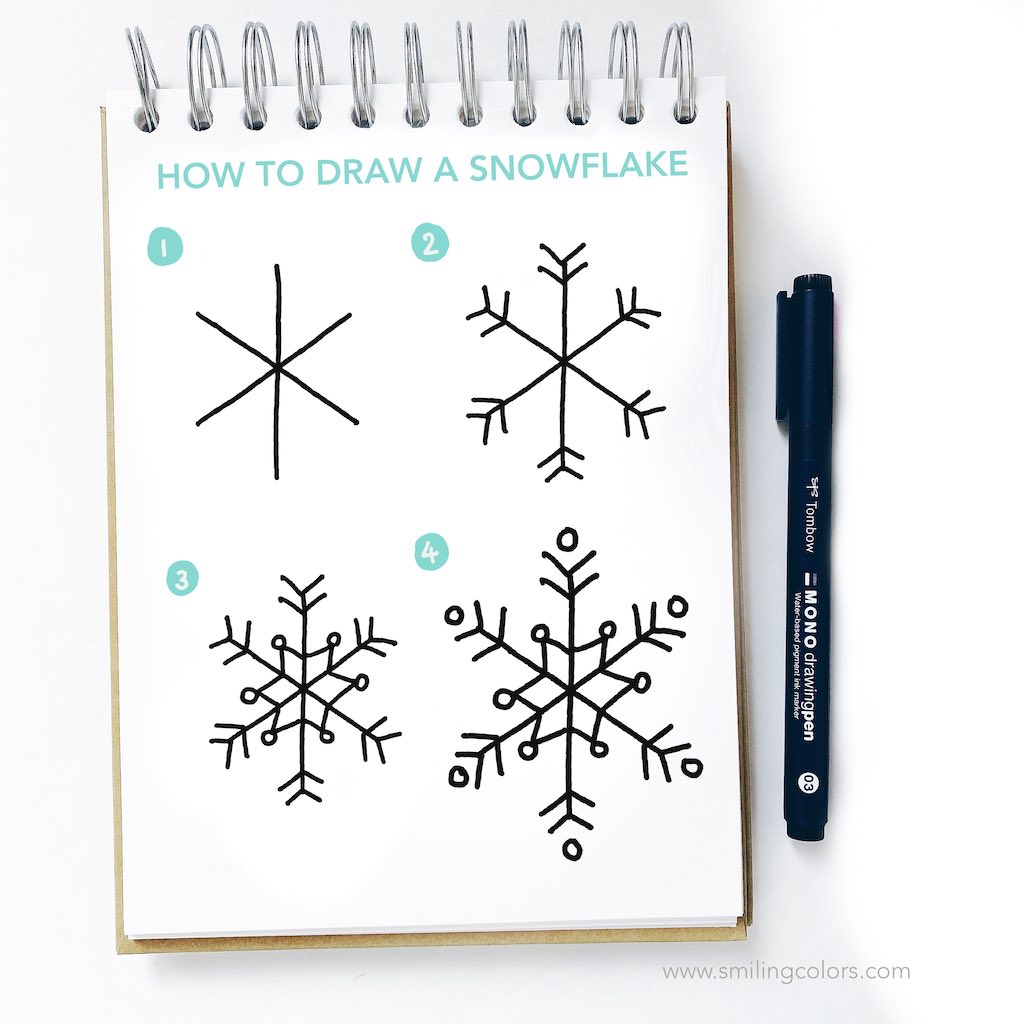
Basic Steps to Draw a Snowflake
Now that you’ve got your tools ready, let’s break down the process of drawing a snowflake into simple steps. Follow along, and you’ll be amazed at how easy it is to create your own masterpiece.
Step 1: Draw the Center
Start by drawing a small circle in the middle of your paper. This will serve as the center point for your snowflake. Think of it as the heart of your design—everything else will branch out from here.
Step 2: Create the Branches
From the center, draw six straight lines radiating outward. These will be the main branches of your snowflake. Make sure they’re evenly spaced and about the same length. This is where symmetry comes into play—if one branch is longer or shorter than the others, your snowflake won’t look balanced.
Step 3: Add Details
Now it’s time to add some flair! On each branch, draw smaller lines or shapes to create a more intricate design. You can experiment with different patterns, such as zigzags, curves, or diamond shapes. Just remember to keep things symmetrical—whatever you add to one branch should be mirrored on the others.
Understanding Symmetry
Symmetry is the key to drawing a realistic snowflake. As I mentioned earlier, most snowflakes have six sides, which means every part of the design should be repeated six times. But how do you ensure perfect symmetry? Here are a few tips:
- Use a ruler to draw straight lines for your branches.
- Draw one side of the snowflake first, then copy it to the other sides.
- Take your time—rushing can lead to mistakes.
Remember, symmetry doesn’t mean everything has to be identical. You can add slight variations to make your snowflake more interesting, as long as the overall balance is maintained.
Creating Unique Variations
Once you’ve mastered the basics, it’s time to get creative! Here are a few ideas to help you create unique snowflake designs:
Idea 1: Add Color
Use colored pencils or markers to bring your snowflake to life. You can choose a single color for a monochromatic look or mix and match shades for a vibrant effect.
Idea 2: Experiment with Shapes
Instead of sticking to traditional snowflake patterns, try incorporating different shapes like stars, hearts, or even animals. The possibilities are endless!
Idea 3: Go Big or Go Home
If you’re feeling ambitious, try drawing a giant snowflake that takes up the entire page. This will allow you to add even more intricate details and make your design truly stand out.
Pro Tips for Stunning Snowflakes
Here are a few expert tips to help you take your snowflake drawings to the next level:
- Study real snowflakes for inspiration—there are tons of photos online.
- Practice makes perfect, so don’t be discouraged if your first attempts don’t turn out as expected.
- Don’t be afraid to make mistakes—they’re part of the learning process.
- Have fun! Drawing should be enjoyable, not stressful.
Examples of Beautiful Snowflakes
To give you some inspiration, here are a few examples of beautiful snowflakes created by talented artists:
- A delicate snowflake with intricate lace-like patterns.
- A bold snowflake with thick, bold lines and vibrant colors.
- A minimalist snowflake with simple geometric shapes.
Take a look at these designs and see how you can incorporate similar elements into your own drawings.
Drawing Snowflakes Digitally
If you’re more comfortable using a tablet or computer, you can also draw snowflakes digitally. Programs like Adobe Illustrator or Procreate offer a wide range of tools and brushes that make it easy to create stunning designs. Plus, you can easily undo mistakes and experiment with different colors and effects.
Advantages of Digital Drawing
Here are a few reasons why digital drawing might be the way to go:
- Unlimited undo options—no more erasing!
- Access to a wide variety of brushes and effects.
- Ability to save and share your work instantly.
Common Mistakes to Avoid
Even the best artists make mistakes sometimes. Here are a few common pitfalls to watch out for:
- Ignoring symmetry—your snowflake will look off-balance if the branches aren’t evenly spaced.
- Overcomplicating the design—sometimes less is more.
- Not taking breaks—drawing for too long can lead to fatigue and mistakes.
Remember, practice is key. The more you draw, the better you’ll get. And don’t be too hard on yourself if things don’t turn out perfectly the first time.
Conclusion
And there you have it—a comprehensive guide on how to draw a snowflake. From understanding symmetry to experimenting with unique designs, you now have all the tools you need to create stunning snowflakes that will impress anyone who sees them.
So, what are you waiting for? Grab your pencils and start drawing! And don’t forget to share your creations with the world. Who knows—you might just inspire someone else to pick up a pencil and join in the fun.
Thanks for reading, and happy drawing!