So, you've got a stubborn sink stopper that just won't budge. Trust me, we've all been there. Whether it's a leaky drain, a clogged pipe, or simply wanting to replace the old stopper with something new, knowing how to remove sink stopper is an essential skill every homeowner should master. And guess what? It's not as complicated as it seems. In this article, I'll break it down step by step, making sure even a complete beginner can handle it without breaking a sweat.
Now, before we dive into the nitty-gritty details, let’s talk about why understanding sink stopper removal is so important. A properly functioning sink is crucial for maintaining hygiene and preventing water damage in your home. Plus, who wants to deal with the frustration of a stuck stopper when you're already having a bad day? By learning how to tackle this issue yourself, you’ll save both time and money—win-win, right?
So buckle up, my friend, because we’re about to embark on a DIY journey that will leave you feeling like a plumbing pro. From identifying different types of sink stoppers to troubleshooting common problems, this guide has got you covered. Let’s get started!
Read also:Kyla Wayans A Rising Star In Hollywoods Brightest Lights
Understanding the Basics: What Is a Sink Stopper?
Before we jump into the "how," let's first clarify what exactly we're dealing with here. A sink stopper is a small but mighty device designed to seal your sink drain, allowing water to accumulate when needed. It plays a critical role in sinks used for washing dishes, shaving, or filling containers. But sometimes, these little guys can become uncooperative, either due to wear and tear or improper installation. Knowing how to remove sink stopper is key to keeping things running smoothly.
Here’s a quick breakdown of the two main types of sink stoppers you might encounter:
- Pop-up stoppers: These are the most common type, found in bathroom and kitchen sinks. They’re controlled by a lever mechanism located near the faucet.
- Plunger-style stoppers: These are simpler designs where the stopper is manually pushed down to close the drain and lifted to open it.
Why Would You Need to Remove a Sink Stopper?
There are several reasons why you might need to remove a sink stopper. Maybe you want to clean out accumulated debris, replace a damaged part, or simply inspect the drainage system. Whatever the reason, having the right knowledge and tools at your disposal makes all the difference.
Tools You'll Need to Remove Sink Stopper
Now that you know what a sink stopper is and why you might need to remove it, let’s talk about the tools you’ll need to get the job done. Don’t worry; you don’t need to rush out and buy expensive equipment. Chances are, you already have most of these items lying around the house:
- Adjustable wrench
- Flathead screwdriver
- Pliers (optional)
- Rubber gloves (to protect your hands)
- Towel or cloth (to catch any water that might spill)
Having the right tools ensures the process goes smoothly and prevents unnecessary damage to your sink or plumbing system.
Pro Tip: Keep a Small Bucket Handy
Water can be unpredictable, especially when working with drains. To avoid making a mess, keep a small bucket nearby to catch any drips or spills. It’s one of those little things that can make a big difference!
Read also:Camilla Araujo Xxx Videos
Step-by-Step Guide: How to Remove Sink Stopper
Alright, let’s get down to business. Follow these simple steps, and you’ll have that pesky stopper out in no time:
Step 1: Turn Off the Water Supply
Safety first, folks! Before you start tinkering with the sink, make sure to turn off the water supply. This will prevent any unexpected water flow while you work. The shut-off valves are usually located under the sink, near the pipes.
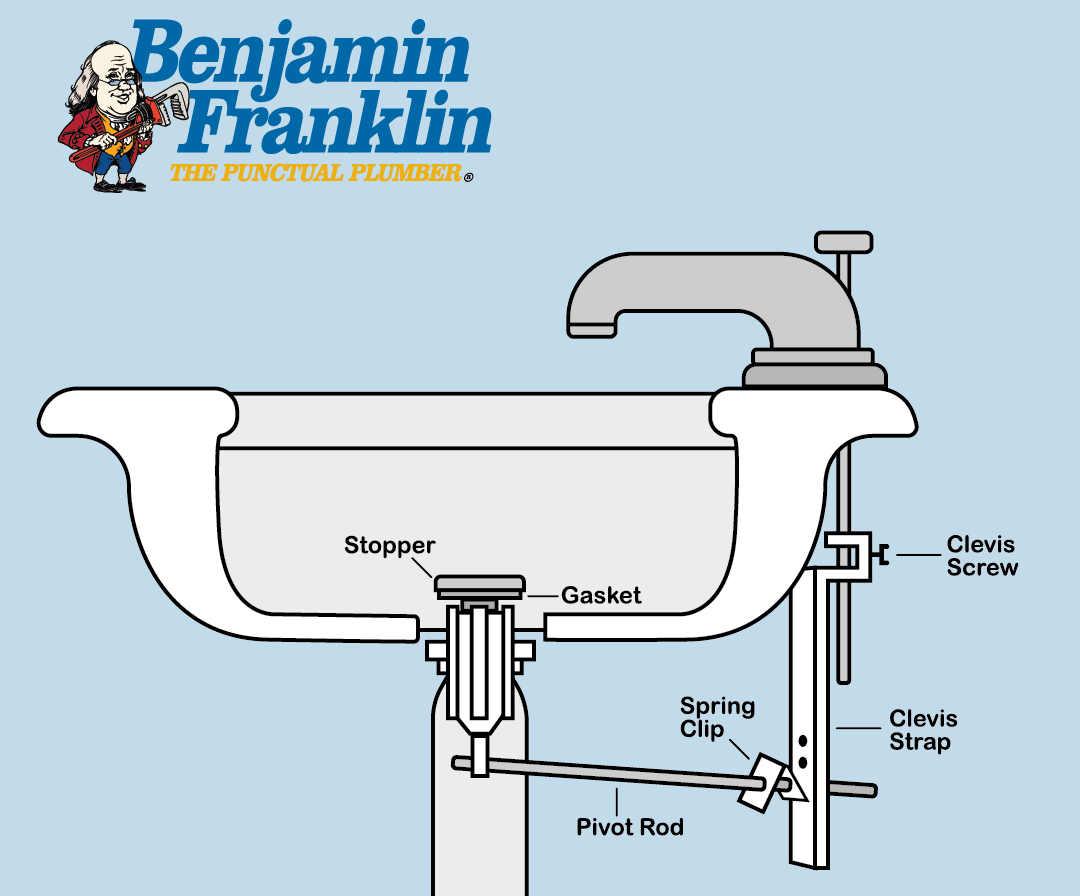
Step 2: Locate the Stopper Mechanism
Depending on the type of sink stopper you have, the mechanism controlling it could be located in different places. For pop-up stoppers, check under the sink for a long rod connected to the stopper. Plunger-style stoppers, on the other hand, are operated manually from the top.
Step 3: Disconnect the Stopper
For pop-up stoppers, use an adjustable wrench to loosen the nut securing the rod to the drain pipe. Once the nut is loose, gently pull the rod upward to release the stopper. If you’re dealing with a plunger-style stopper, simply lift it out of the drain.
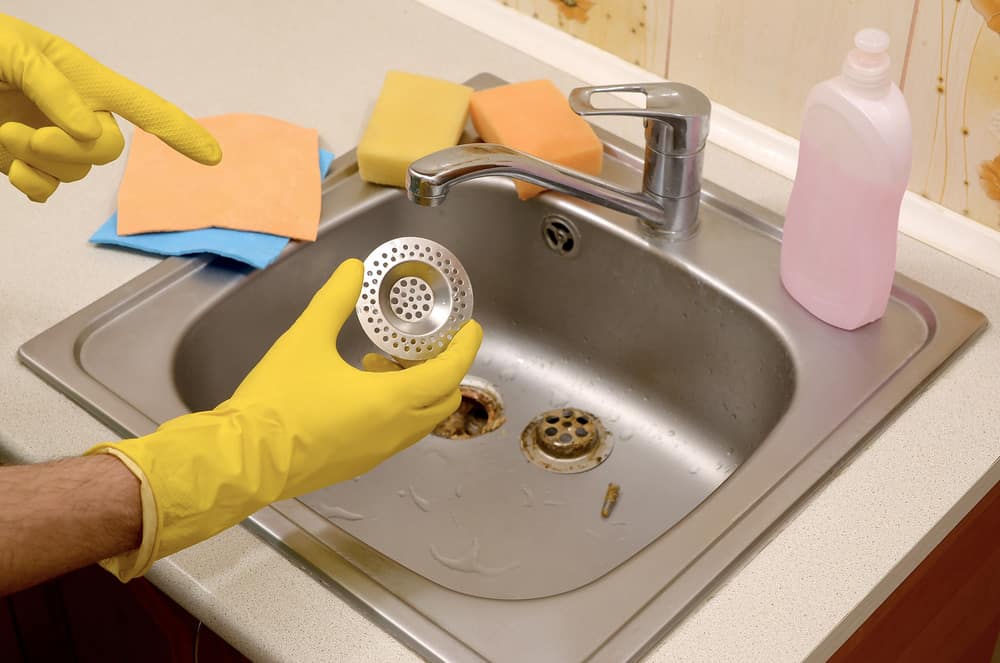
Step 4: Clean or Replace the Stopper
Once the stopper is removed, take a moment to inspect it for any signs of damage or wear. If it’s still in good condition, give it a thorough cleaning to remove any built-up grime. Otherwise, consider replacing it with a new one.
Step 5: Reassemble the Sink
After cleaning or replacing the stopper, carefully reassemble everything in reverse order. Make sure all connections are tight but not overtightened, as this can cause leaks or damage. Test the stopper to ensure it’s functioning properly.
Common Issues and Troubleshooting
Even with the best intentions, things can sometimes go awry. Here are some common issues you might encounter while removing a sink stopper and how to fix them:
- Stuck stopper: If the stopper won’t budge, try applying a bit of lubricant to the mechanism. Let it sit for a few minutes before attempting again.
- Leaking connections: Double-check that all nuts and fittings are tightened securely. A small amount of plumber’s tape can also help seal leaks.
- Broken parts: If any components appear damaged, replace them immediately to avoid further issues.
DIY Tips for Maintaining Your Sink
Prevention is always better than cure, so here are a few tips to keep your sink in tip-top shape:
- Regularly clean your sink and drain to prevent buildup.
- Avoid pouring grease or food particles down the drain, as they can cause clogs.
- Inspect the stopper periodically to ensure it’s functioning correctly.
DIY Myth Busting: Vinegar and Baking Soda
While vinegar and baking soda are great for unclogging minor drains, they won’t do much for a stuck sink stopper. Stick to the methods outlined above for best results.
Expert Advice: When to Call a Plumber
Let’s face it—sometimes DIY just isn’t enough. If you’ve tried everything and the sink stopper still won’t budge, it might be time to call in a professional. Plumbers have specialized tools and expertise that can handle even the toughest jobs.
How Much Does It Cost?
Plumbing costs vary depending on location and the complexity of the job. On average, you can expect to pay between $50 and $150 for a simple sink stopper removal. However, catching issues early and tackling them yourself can save you a bundle in the long run.
Conclusion: Empower Yourself with Knowledge
And there you have it—a comprehensive guide on how to remove sink stopper like a pro. By following the steps outlined above, you’ll not only save money but also gain confidence in your DIY skills. Remember, maintaining your home’s plumbing is all about staying proactive and informed.
So, what are you waiting for? Grab those tools and show that sink stopper who’s boss. And don’t forget to share your success story in the comments below. Your fellow DIY enthusiasts would love to hear about it!
Table of Contents
- Understanding the Basics: What Is a Sink Stopper?
- Tools You'll Need to Remove Sink Stopper
- Step-by-Step Guide: How to Remove Sink Stopper
- Common Issues and Troubleshooting
- DIY Tips for Maintaining Your Sink
- Expert Advice: When to Call a Plumber
- Conclusion: Empower Yourself with Knowledge
Happy plumbing, my friend!