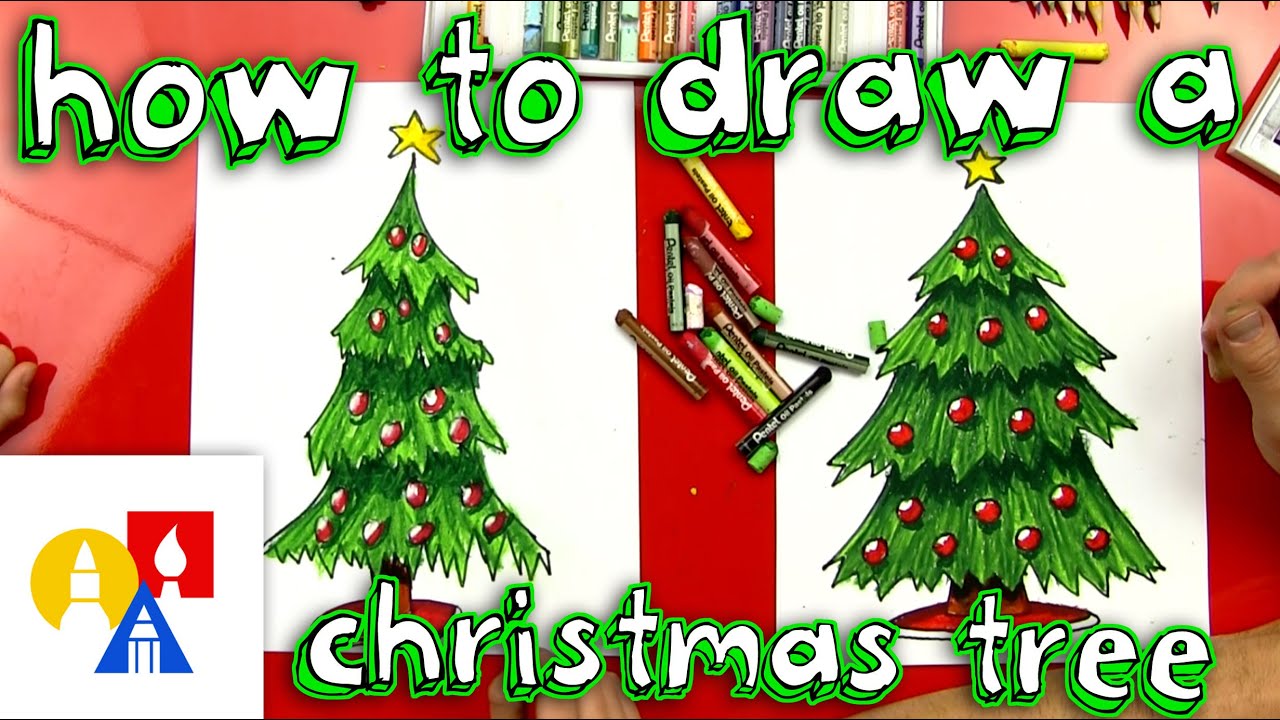
Hey there, crafty friend! If you're looking to learn how to draw a Christmas tree, you've come to the perfect place. Whether you're a beginner or just brushing up on your skills, this guide will walk you through every step of the process. Drawing a Christmas tree is not only fun but also a great way to get into the holiday spirit. So grab your pencil, some paper, and let's dive right in!
There’s something magical about Christmas trees. They symbolize joy, celebration, and togetherness. But did you know that learning how to draw a Christmas tree can be just as rewarding? It’s like creating your own little piece of holiday magic. And trust me, it’s easier than you think. In this article, we’ll break down the process step by step, so even if you’ve never picked up a pencil before, you’ll end up with a masterpiece in no time.
Before we jump into the nitty-gritty, let’s talk about why drawing a Christmas tree is such a cool skill to have. Whether you’re decorating cards, designing gifts, or just doodling for fun, knowing how to create a festive Christmas tree can add that special touch to your projects. Plus, it’s a great activity to do with family or friends during the holidays. Ready to get started? Let’s go!
Read also:Xxx Hot
Why Drawing a Christmas Tree is a Must-Try Skill
Alright, let’s be real. Drawing a Christmas tree might seem intimidating at first, but it’s actually one of the most satisfying things to create. Here’s why:
- It’s a great way to express creativity and let your imagination run wild.
- You can customize your tree with ornaments, lights, and other festive details.
- It’s a perfect activity for kids and adults alike, making it a great bonding experience.
- And hey, who doesn’t love showing off their artistic skills during the holidays?
When you learn how to draw a Christmas tree, you’re not just learning a new skill—you’re tapping into the joy of creating something beautiful. Plus, once you’ve mastered the basics, you can experiment with different styles and techniques. From minimalist designs to elaborate, detailed trees, the possibilities are endless.
What You’ll Need to Get Started
Before we dive into the steps, let’s talk about what you’ll need. Don’t worry, you don’t need fancy art supplies to get started. Here’s a quick list:
- A pencil (or a pen if you’re feeling confident)
- A piece of paper (any size will do)
- An eraser (just in case you make a mistake)
- Colored pencils, markers, or crayons (optional, for adding details)
See? Nothing too complicated. Now that you’ve got your tools ready, let’s move on to the fun part.
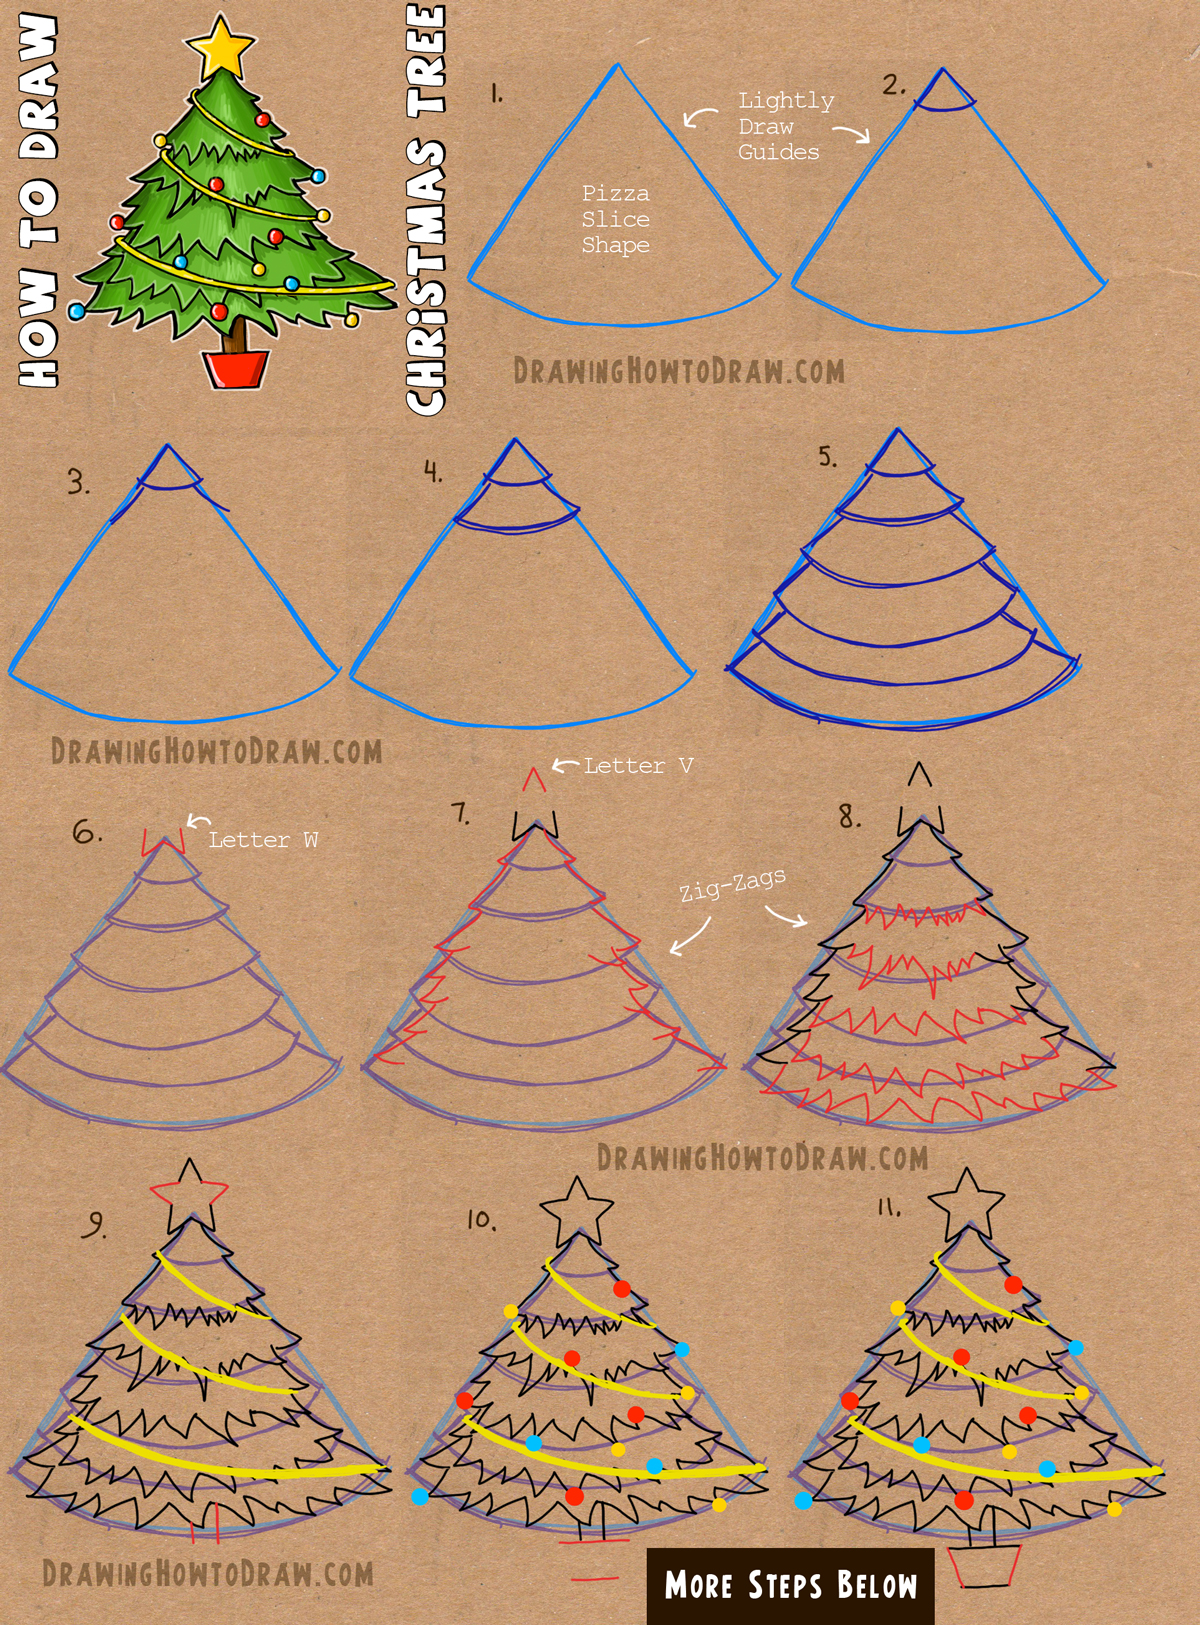
Step 1: Sketching the Basic Shape
The first step in learning how to draw a Christmas tree is sketching the basic shape. Think of it as the foundation of your masterpiece. Start by drawing a triangle. Don’t worry if it’s not perfect—this is just a rough outline. You can always refine it later.
Here’s a pro tip: draw lightly at first so you can easily erase any mistakes. Once you’re happy with the shape, you can go over it with a darker line. This will give your tree a more defined look.
Read also:Billie Eilish Xxx
Adding Depth to Your Tree
Now that you’ve got the basic shape down, it’s time to add some depth. This is where your tree really starts to come alive. Start by drawing smaller triangles inside the larger one. These will represent the layers of branches. Again, don’t worry about perfection—just have fun with it.
You can also add some texture by drawing little lines or dots to mimic the look of pine needles. This will give your tree a more realistic appearance. Remember, the key is to keep it simple and let your creativity shine.
Step 2: Drawing the Trunk
No Christmas tree is complete without a trunk, right? This part is super easy. Just draw a rectangle at the bottom of your triangle. Make it slightly wider at the bottom to give it a more natural look. You can also add some details like lines or bumps to make it look more like real wood.
Here’s another tip: if you want your tree to look extra festive, you can add some decorations to the trunk. Think bows, ribbons, or even a little star at the top. The possibilities are endless!
Customizing Your Trunk
Feeling adventurous? Why not try drawing a different type of trunk? You could make it look like a gingerbread house or even a candy cane. The choice is yours! Just remember to keep it fun and festive.
Step 3: Adding Ornaments and Lights
This is where the real magic happens. Once you’ve got the basic shape and trunk down, it’s time to decorate your tree. Start by adding some ornaments. These can be simple circles or more elaborate shapes like stars, bells, or candy canes. Use your colored pencils or markers to make them pop.
Next, add some lights. You can do this by drawing little dots or lines all over your tree. Again, don’t worry about perfection—just have fun with it. You can even add a little sparkle by using a highlighter or glitter pen.
Tips for Decorating Your Tree
Here are a few tips to help you take your tree to the next level:
- Use a variety of colors to make your ornaments stand out.
- Experiment with different shapes and sizes for a unique look.
- Don’t forget to add a star or angel at the top of your tree!
And remember, the best part about decorating your tree is that there are no rules. Let your imagination run wild and create something truly special.
Step 4: Final Touches
Now that you’ve got the basics down, it’s time to add those final touches. Take a step back and look at your tree. Is there anything you want to change? Maybe you want to add more ornaments or adjust the shape of the branches. This is your chance to make it truly yours.
You can also add a background to your drawing. Think snowflakes, stars, or even a fireplace. This will give your tree some context and make it feel even more festive.
Shading and Highlighting
If you want to take your drawing to the next level, try adding some shading and highlighting. This will give your tree a more three-dimensional look. Use a darker pencil for the shadows and a lighter one for the highlights. It might take a little practice, but the results will be worth it.
Common Mistakes to Avoid
Even the best artists make mistakes sometimes. Here are a few common ones to watch out for when learning how to draw a Christmas tree:
- Forgetting to add details like ornaments and lights.
- Not sketching lightly enough, making it hard to erase mistakes.
- Overcomplicating the design—sometimes simple is better!
Remember, the goal is to have fun and express your creativity. Don’t get too caught up in perfection. Your tree is unique, just like you!
How to Fix Mistakes
Mistakes happen, and that’s okay! If you make a mistake, just grab your eraser and start again. You can also use a pencil sharpener to create a fine point, which will help you make more precise corrections. And if all else fails, start over on a fresh piece of paper. Practice makes perfect!
Expert Tips for Drawing a Christmas Tree
Want to take your Christmas tree drawing skills to the next level? Here are a few expert tips:
- Study real Christmas trees for inspiration. Look at how the branches are layered and how the ornaments are arranged.
- Practice different styles, from minimalist to elaborate, to find what works best for you.
- Experiment with different mediums, like watercolors or charcoal, to create unique effects.
And most importantly, don’t be afraid to try new things. The more you practice, the better you’ll get. Who knows? You might just discover a hidden talent for drawing Christmas trees!
Where to Find Inspiration
If you’re feeling stuck, there are plenty of places to find inspiration. Check out Pinterest, Instagram, or even your favorite holiday movies for ideas. You can also visit a local Christmas tree farm or look at pictures of decorated trees online. The key is to keep your eyes open and let your creativity flow.
Conclusion: Your Christmas Tree Masterpiece
And there you have it—your very own Christmas tree masterpiece! Learning how to draw a Christmas tree is not only fun but also a great way to express your creativity. Whether you’re a beginner or a seasoned artist, there’s always something new to discover.
So what are you waiting for? Grab your pencil and start creating. And don’t forget to share your masterpiece with the world. Who knows? You might inspire someone else to pick up a pencil and join in the fun. Happy drawing, and merry Christmas!
Table of Contents
- Step 1: Sketching the Basic Shape
- Step 2: Drawing the Trunk
- Step 3: Adding Ornaments and Lights
- Step 4: Final Touches
- Common Mistakes to Avoid
- Expert Tips for Drawing a Christmas Tree
- Where to Find Inspiration
- Why Drawing a Christmas Tree is a Must-Try Skill
- What You’ll Need to Get Started
- Conclusion: Your Christmas Tree Masterpiece