**If you're looking for simple henna designs that won't overwhelm your creativity, you've come to the right place. Whether you're a beginner or just someone who loves experimenting with henna art, this guide is packed with tips, tricks, and inspiration to help you create beautiful designs effortlessly. From floral patterns to geometric masterpieces, we've got you covered. So, grab your henna cone and let's dive in!**
Henna designs have been around for centuries, and they continue to captivate people across the globe. But let's face it—not everyone has the skill or time to create intricate, complex patterns. That's where simple henna designs come in. They're easy to execute, visually appealing, and perfect for those who want to add a touch of elegance without breaking a sweat.
Whether you're attending a wedding, festival, or just want to spice up your everyday look, simple henna designs can elevate your style effortlessly. In this article, we'll explore everything you need to know about creating stunning henna art that looks professional but is beginner-friendly. Let's get started!
Read also:Camilla Araujo Pron
Table of Contents
- What Are Simple Henna Designs?
- A Brief History of Henna
- Tools You'll Need for Simple Henna Designs
- Popular Simple Henna Designs
- Creating Floral Patterns
- Exploring Geometric Designs
- Tips for Beginners
- How to Maintain Your Henna Design
- Common Mistakes to Avoid
- Conclusion: Start Your Henna Journey Today
What Are Simple Henna Designs?
Simple henna designs refer to patterns that are easy to create and don't require advanced skills. These designs are perfect for beginners or anyone who wants a quick and stylish henna look. They usually consist of basic shapes, lines, and motifs that can be combined to create visually appealing art.
Think of simple henna designs as the building blocks of henna art. You don't need to be an expert to create something beautiful. With a little practice, you'll be able to impress your friends and family in no time.
A Brief History of Henna
Henna has a rich history that dates back thousands of years. Originating in ancient Egypt and India, henna was used for both decorative and ceremonial purposes. It was believed to bring good luck, prosperity, and blessings to those who wore it.
Today, henna is widely used in weddings, festivals, and cultural celebrations. Its popularity has grown globally, and it's now a staple in many beauty routines. Simple henna designs have become especially popular because they're accessible and fun for everyone.
Tools You'll Need for Simple Henna Designs
Before you start creating your masterpiece, make sure you have the right tools. Here's a list of essentials you'll need:
- Henna cone (pre-filled or refillable)
- Henna paste (make sure it's high quality and safe to use)
- Orange or lemon juice (to help the henna stain)
- Cotton swabs (for touch-ups)
- Alcohol wipes (to clean the area before application)
Having the right tools makes all the difference. Trust me, you don't want to be fumbling around with the wrong materials when inspiration strikes.
Read also:Mydesi Mms
Popular Simple Henna Designs
There are countless simple henna designs to choose from. Here are some of the most popular ones:
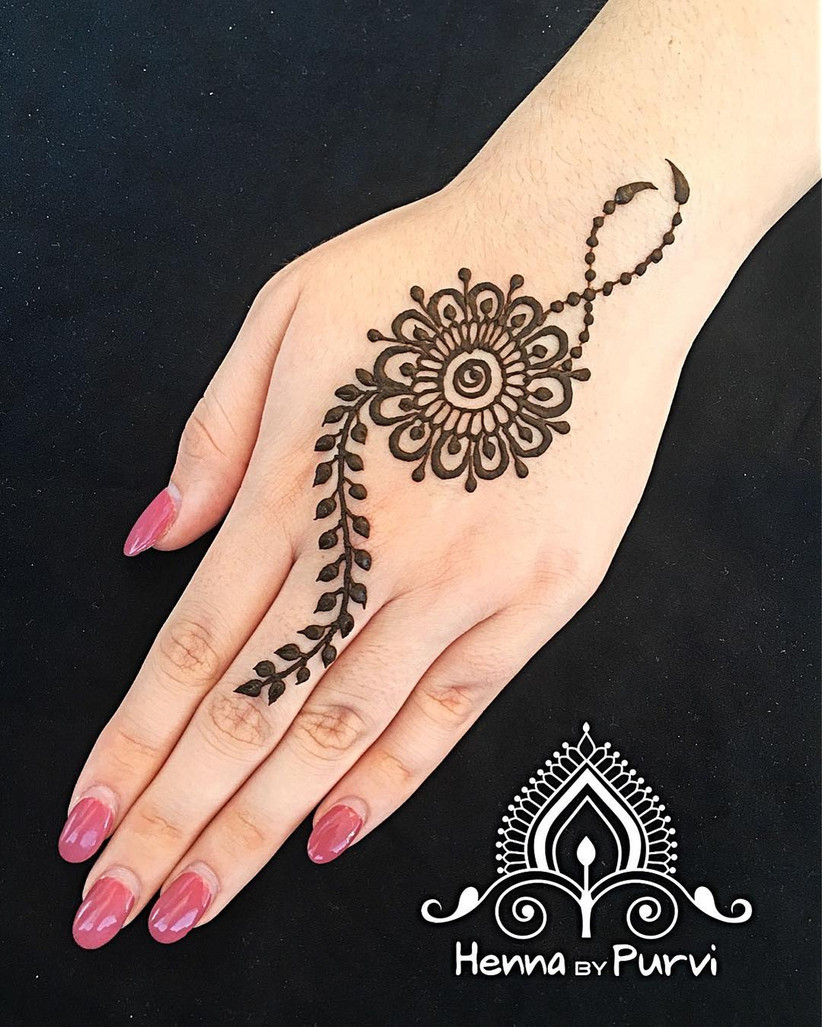
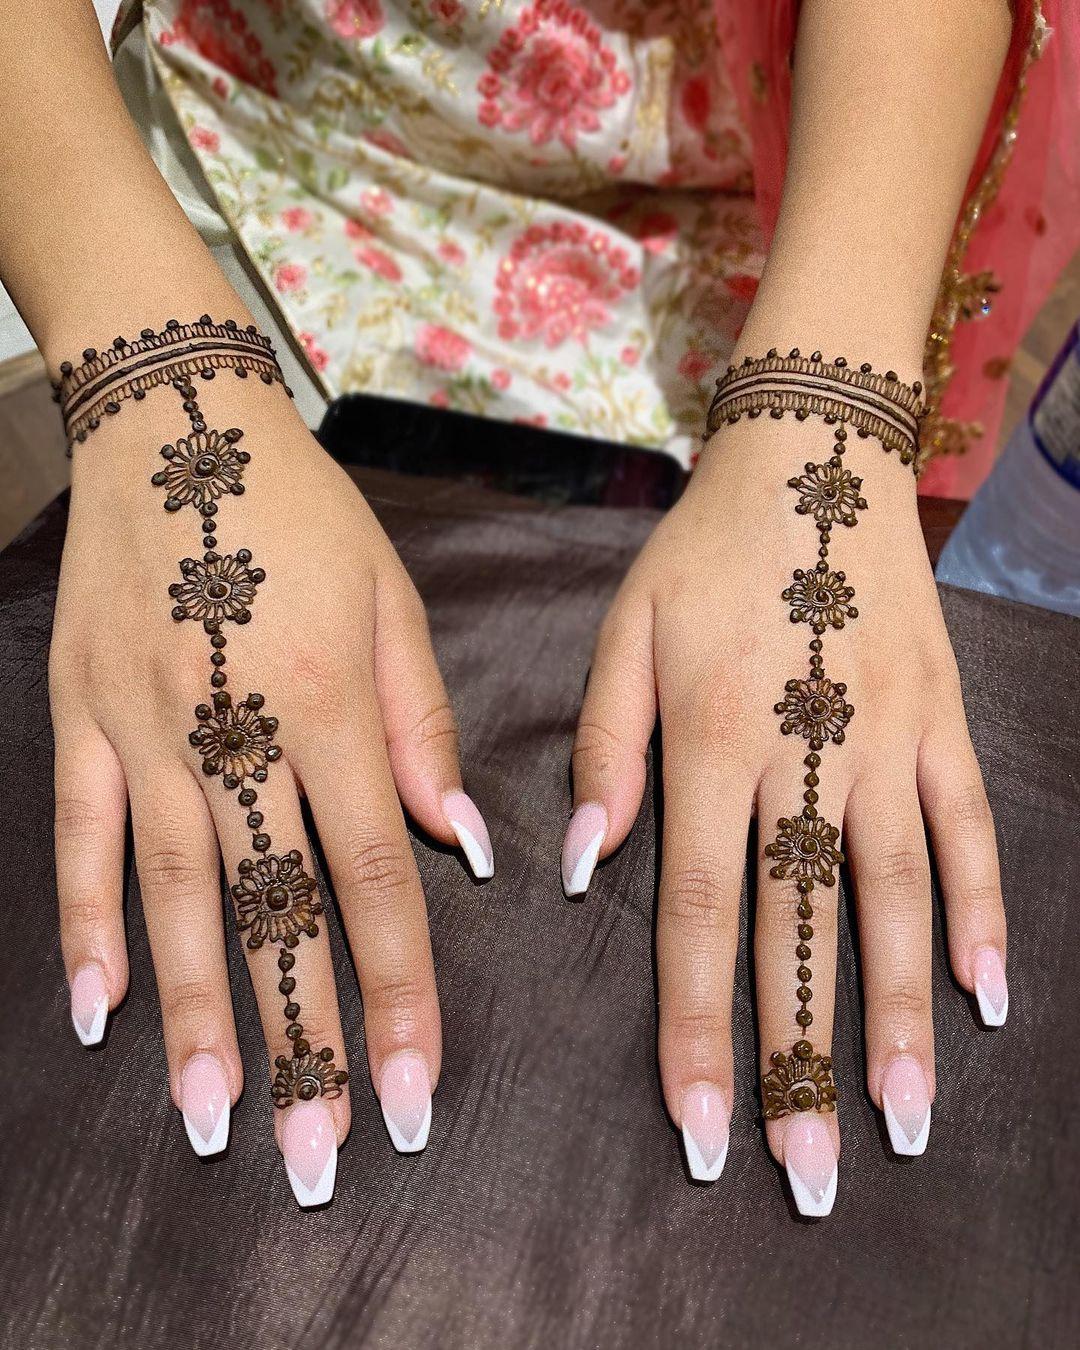
Floral Patterns
Floral patterns are a classic choice for simple henna designs. They're versatile, elegant, and can be customized to suit any occasion. Start with basic shapes like petals and leaves, and gradually add more details as you get comfortable.
Geometric Shapes
Geometric designs are modern and chic. They're perfect for those who want something edgy yet simple. Think triangles, diamonds, and zigzag patterns that create a striking visual effect.
Arabic-Inspired Motifs
Arabic henna designs often feature intricate patterns, but you can simplify them by focusing on key elements like curves and swirls. These designs are great for adding a touch of tradition to your look.
Creating Floral Patterns
Floral patterns are one of the easiest and most beautiful simple henna designs to create. Here's a step-by-step guide to help you get started:
- Start with a small circle for the center of the flower.
- Add petals around the circle, making sure they're evenly spaced.
- Draw smaller petals or dots inside the circle for added detail.
- Connect the petals with curved lines to create a seamless design.
Voilà! You've just created a stunning floral pattern that's perfect for any occasion.
Exploring Geometric Designs
Geometric designs are all about clean lines and sharp angles. Here's how you can create a simple yet stunning geometric henna design:
- Draw a straight line as your starting point.
- Add triangles or diamonds along the line, alternating their sizes for variation.
- Connect the shapes with small dots or dashes for a cohesive look.
- Experiment with different shapes and angles to create a unique design.
Geometric designs are perfect for those who love modern and minimalist aesthetics.
Tips for Beginners
Creating simple henna designs doesn't have to be intimidating. Here are some tips to help you get started:
- Practice on paper first to get a feel for the henna cone.
- Start with basic shapes and gradually add complexity.
- Use alcohol wipes to clean the area before applying henna for better results.
- Let the henna dry completely before moving or touching it.
- Be patient and enjoy the process—it's all about having fun!
Remember, practice makes perfect. The more you experiment, the better you'll become.
How to Maintain Your Henna Design
Once you've created your simple henna design, you'll want to make sure it lasts as long as possible. Here are some tips to help you maintain your design:
- Avoid washing the area for at least 6-8 hours after application.
- Use moisturizers or henna aftercare balms to keep the design hydrated.
- Avoid exposure to water as much as possible during the first 24 hours.
- Gently exfoliate the area after a few days to reveal a darker stain.
With proper care, your henna design can last up to two weeks, depending on the location and your skin type.
Common Mistakes to Avoid
Even the best henna artists make mistakes sometimes. Here are some common pitfalls to watch out for:
- Using low-quality henna paste, which can result in a poor stain.
- Not letting the henna dry completely before moving or touching it.
- Washing the area too soon after application, which can fade the design.
- Not exfoliating properly, which can reduce the longevity of the stain.
Avoid these mistakes, and you'll be well on your way to creating beautiful simple henna designs.
Conclusion: Start Your Henna Journey Today
Simple henna designs are a fantastic way to express your creativity and enhance your personal style. Whether you're a beginner or just looking for something quick and easy, there's a design out there for everyone. With the right tools, techniques, and a little practice, you'll be creating stunning henna art in no time.
So, what are you waiting for? Grab your henna cone and start your journey today. And don't forget to share your creations with us in the comments below. We'd love to see what you come up with!